Configure Lync 2010 voice using a SIP gateway and an uncertified SIP trunk, step-by-step – Part 2

This post takes on right where post 1 in this series ended and we will jump right into it. We will cover PSTN Gateway configuration, Trunk configuration, Normalization rules and Voice Routes.

PSTN Gateway

Head over to you Lync Server 2010 and open up Lync Server Topology Builder, then choose Download Topology existing deployment and click Ok.

ix7825

Choose a location and enter a name for you topology file and then click Save.

ix7826

Expand Mediation pools and then click Edit Properties… in the Actions pane.

ix7827

Select New to create a PSTN gateway.

ix7828

Enter the FQDN or IP address for your gateway, ensure TCP is set as we configured TCP in the Intertex IX78 in the previous post and change the default port to 5060. When finished click Ok.

ix7829

Make sure that the gateway is listed in the The following gateways are associated with this mediation server and  then click Ok.

ix7830

Go ahead and publish your new topology. I will not cover the publishing in this post, instead we will continue with configuring our trunk.

Trunk Configuration

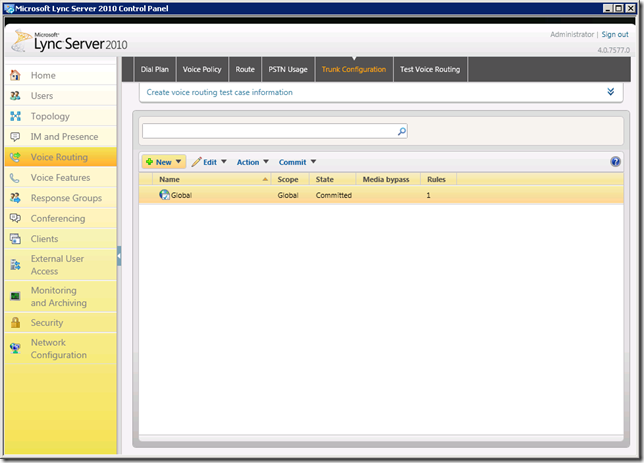
Open the Lync Server control Panel and navigate to Voice, Trunk Configuration and click New.

ix7831

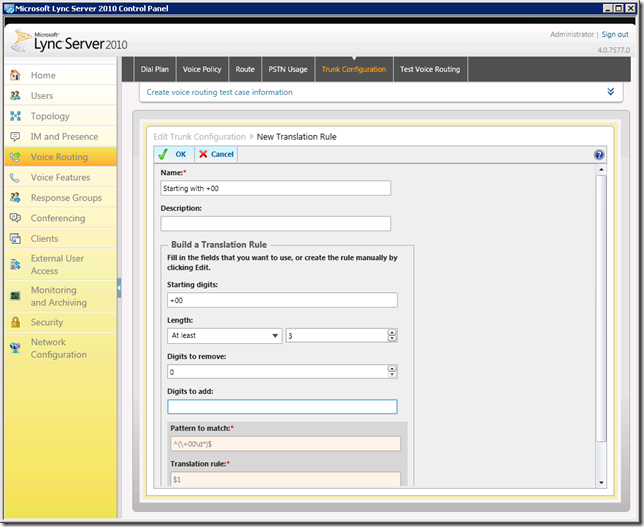
Make sure your settings match mine and then create a translation rule by clicking New.

ix7832

I will create a Translation Rule that looks for the +00 prefix, and makes sure that the number is more then 3 digits long, then it replaces 0 digits (in other words it does not replace anything). We will use Normalization Rules to make sure that the dialed numbers have an ok syntax. When finished click Ok to save our Translation Rule.

ix7834

Take a quick look at the configured settings and then click Ok to save your Trunk configuration.

ix7835


Normalization Rules

Normalization rules define how phone numbers expressed in various formats are to be routed for the named location. It is a way of forming an E. 164 number from the number dialed by an Lync Server 2010 user. It is necessary for call routing because users may dial numbers in various formats.

I will list all my 5 Normalization Rules, you might not need all of them but this is what works for me in my lab in Sweden. Feel free to add a comment if you need help with forming these rules, it can be quite tricky. More information regarding Normalization Rules can be found here and here.

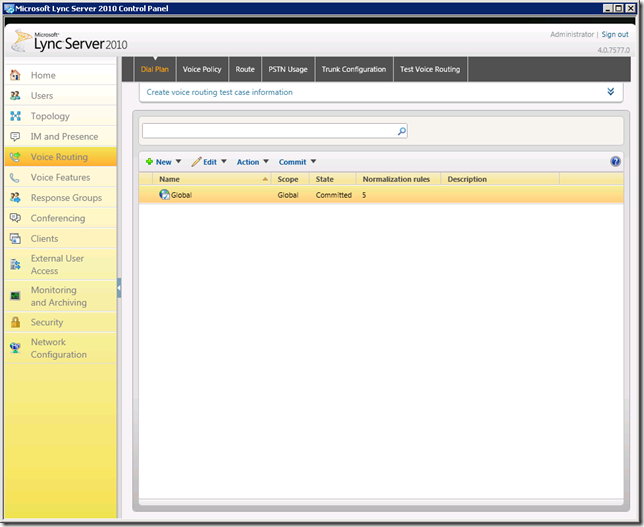
Navigate to Voice Routing and Dial Plans and open your Global Dial Plan.

ix7836

In my example you can see the 5 Normalization Rules that I use for my lab environment. Create a new rule by clicking New.

ix7837

This rule initiates on the starting digits 00, it does simply that and nothing more. The reason for this is that I want to normalize all numbers to include both country code and area code, for example 0046855566677. I would recommend you to try different Normalization Rules until you have a combination of rules that fits your needs and demands.

ix7838

To make sure that your rule works you can test it before clicking Ok and saving it. If I enter a number that I believe should match the rule and then click Go it should display the normalized number in green.

ix7839

My next Normalization Rule initiates if a number starts with a single 0 and is at least 1 digit long. In Sweden our area codes starts with a single 0. Then it adds the prefix 0046 to make it a standard Swedish number including the country code.

ix7840

When I enter a number with Stockholm’s area code it should Normalize it to a number that that removes the initiating 0 and then adds the prefix for the Swedish country code.

ix7841

My next Normalization Rule initiates on any number starting with one of the numbers 1 to 8. A local number in Sweden can start with any of those numbers. It must also be at least 5 numbers long since no telephone number in Sweden has less then 5 numbers. Then it adds the local area code of both Sweden and Stockholm.

ix7842

And when I test this rule with a local number it should add a prefix of 00468.

Note: This Normalization Rule assumes that this server is placed in Stockholm and that all numbers missing an area code is meant for Stockholm.

ix7843

This next rule initiates based on the staring digit +, as in +46855566677. It then removes the + and adds 00.

ix7844

And when tested it does exactly that…

ix7845

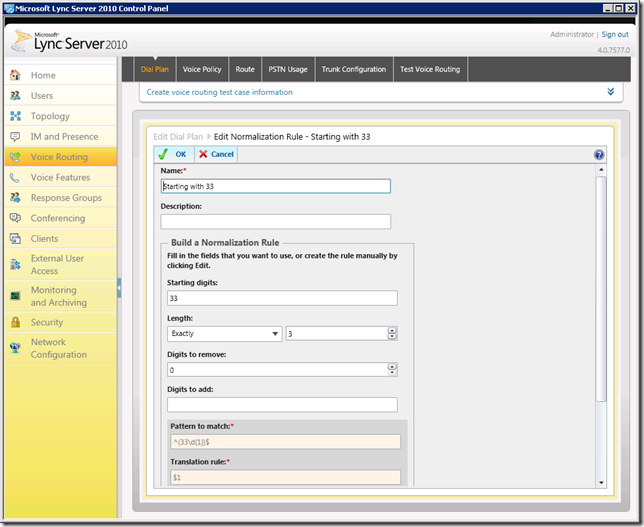
And last but not least, this rule initiates when the number starts with 33 and is exactly 3 digits long. This indicates that it is a local number and it should not be normalized in any way.

ix7846

When tested it does seem to match, note that I have also checked Internal Extension.

ix7847

When you have added all your Normalizations Rules you can make more tests if you want and then click Ok to save your Dial Plan.

ix7848

I am by far no expert in normalization rules, if you have any thought on the rules I use please feel free to post a comment or contact me and I will be happy to optimize my lab.

Route Configuration

Our final step towards a working Lync Server 2010 voice implementation is to configure routing. A Voice Route looks for a specific pattern in numbers and then decides which gateway that it will route the call to. Navigate to Voice Routing and then Route. Click New to create a new route.

ix7849

Give the Voice Route a Name and then add the pattern that you want this route to match. In my case I have normalized everything that is supposed to leave the Lync Server with 00 I add 00. In your case this might differ depending on your Normalization Rules.

ix7850

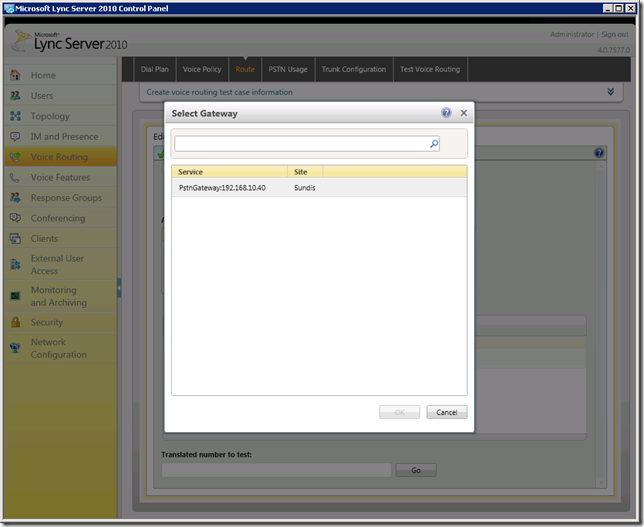
The next step is to add an Associated gateway. Click on Add to open the gateway selection.

ix7851

Search for and select the gateway you would like to add and then click Ok to save your selection.

ix7855

Next we must add an Associated PSTN usages, click Select to open the PSTN usage record selection.

ix7856

Select your PSTN record and then click Ok.

ix7857

Now it is time to test our routing. Enter a suitable number that you think should match the pattern and click Go.

ix7854

Also, to make sure that all is well, enter a number that should not match the pattern.

ix7853

When finished save the Voice Route by clicking Ok.

Now make sure that you Commit all changes properly!!

After this you should be all set and ready for testing. This concludes part 2 of this series, I hope you have enjoyed reading it and that you find it useful. If you have any thoughts or questions regarding the configuration please do not hesitate to post a comment.

Part 1 in this series can be found here!

Part 2 in this series can be found here!

Configure Lync 2010 voice using a SIP gateway and an uncertified SIP trunk, step-by-step – Part 1

I got an idea the other day, I want to set up a Lync Server 2010 server and implement voice capabilities using a ordinary uncertified SIP trunk. this will hopefully give some of you out there an idea of what needs to be done for this to work without the need of an expensive certified trunk.

For the test I will use a ordinary consumer grade SIP trunk from the Swedish provider Cellip. Since the point is not to use a Lync certified enterprise SIP trunk I need something to handle the incoming trunk and then transfer it to Lync Server 2010.

I got a tip from Cellip that an Intertex IX78 is what I need. This product was actually something that I had never heard of, but I contacted Intertex and they where kind enough to provide me with a unit that I could use for my test.

Action plan

I already have a Lync Server 2010 deployed in my environment without phone configuration so I will exclude the Lync Server 2010 installation from this guide, more information on this in a step-by-step format can be found here.

  1. SIP enable users
  2. Configure the Intertex IX78 to handle the incoming SIP trunk and forward it to Lync Server 2010
  3. Configure Lync Server 2010 to receive incoming and outgoing calls

The Intertex IX78

First, I will start by giving you some information about the Intertex IX78 which I have found is a very useful piece of equipment. I have never had the privilege to work with it before but while performing this test I have got the opportunity to test it. The IX78 can actually do a lot of things and much more then what I have used it for, for example, it has a built-in advanced ADSL modem, supports wireless 802.11b/g, and provides back-up PSTN connectivity for emergency call handling. It is also the only firewalls in their market segment that I have heard of that fully addresses real-time, SIP-based Multimedia applications on the LAN.

But I will focus a bit more on the SIP functions of the IX78. One of the best functions that I have tested is the LAN SIParator module. This module enables one to add the IX78 while keeping an existing firewall that is thereby made SIP capable. This is great in production environment since it requires minimal changes in the existing firewall configuration. Let me explain this a bit more by showing you the setup I am using for this lab.

To start with, I am using a ADLS internet connection provided by Telia Sonera AB, one of Sweden’s largest ISPs. To connect to this I use a standard Zyxel ADSL modem, and it is quite old to be honest. Then, I have the Intertex IX78 running as a LAN SIParator with one leg on the internal network for connection to the Lync 2010 server and one leg connected to a Microsoft Threat Management Gateway (TMG) 2010 that I use as the primary firewall.

IX78

When using the LAN SIParator module I do not have to make any changes to my TMG which is very good. You might think that running this setup could cause disruption to the traffic passing through the IX78, but so far I have hade no trouble at all and have seen no loss in bandwidth or quality. It is absolutely doing its job and doing it great.

I am not going to make this a review of the IX78 but I would absolutely recommend it to anyone who thinks about implementing a solution similar to this. More information regarding the Intertex IX78 can be found on the Intertex homepage here.


Cellip

To be able to perform this test I needed someone to provide me with a trunk. Because they where recommended to me from at least two friends the choice fell on Cellip. Cellip is one of Sweden’s largest providers of communications solutions based on both mobile and PSTN to both companies and private persons.

I contacted Cellip as well and they set me up with an account with plenty of credit, a big thank you to Cellip for making the effort of helping me with this project. I am not going to walk you through the process of setting up a Cellip account since that is very easily done. If you need any assistance the excellent support will guide you through it. I have contacted them a couple of times during this project and they have been most helpful. You can find more information regarding Cellip on their homepage here.


SIP Enable a User

First I will start with SIP enabling a user that we will use for this test. I have created the user Test User1 for this test with the following configuration:

First name: Test
Last name: User1
User name: test.user1
SIP address: test.user1@sundis.local
Telephone number: 335

To SIP enable a user you need to open the Lync Server 2010 Control Panel. And then navigate to the Voice tab.

ix7801

Click on Enable User to open the New Lync Server User window.

ix7802

Click on Add to find the user you want to enable.

ix7803

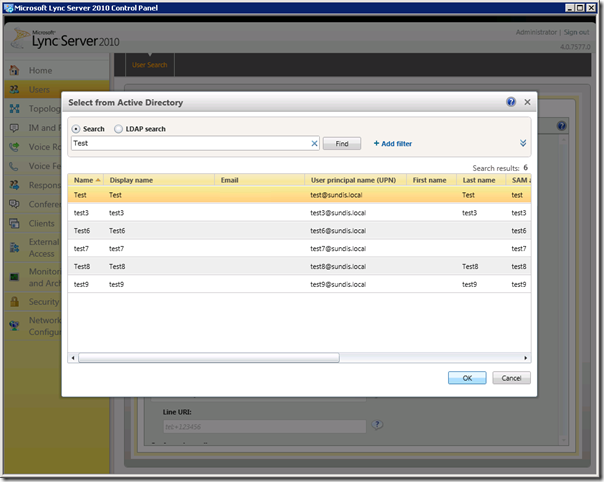
Enter the name of the user and click Find, or simply click Find to list all available users. Select the user you want to add and then click OK.

ix7804

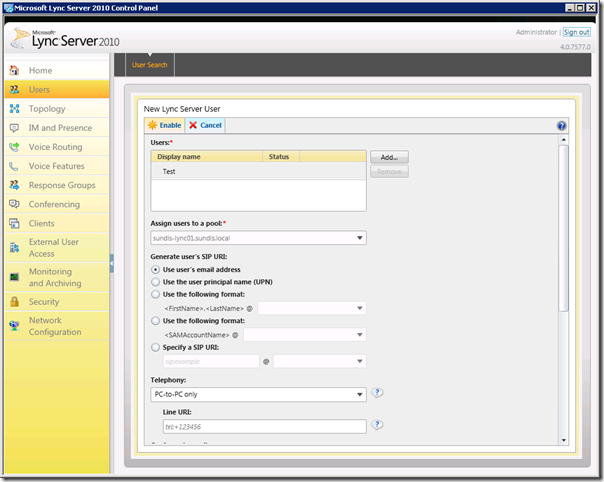
You will see that the user we selected now is listed in the Users box. Choose to assign your user to a pool, in my case I have only got one. You also need to make sure that the correct SIP URI is selected, I use an internal address for my SIP URI and specify it accordingly. Under Telephony, choose Enterprise Voice in the dropdown menu and enter the internal extension number that you want to use, make sure that you prefix the number with TEL:. We will keep the rest of the settings as default, click Enable to finish.

ix7823

The user we just enabled now shows up in the list.

ix7824

That is all we have to do to enable our user for voice, now we will take a look a the Intertex IX78.

Configuring the Intertex IX78

We want to configure the IX78 to run in WAN SIParator 1 mode to match the previously described scenario, we also need to configure SIP Trunk settings and network settings. To help us with this configure the IX78, Intertex has implemented a very good wizard in the IX78.

Note: Before proceeding, please contact Intertex and make sure that you have a firmware that fully supports the use of WAN SIParator 1 mode.

After you log on you are met by the home page of the IX78, it gives us the top menu which includes quick links to all topics and you also have a number of different links on the home page.

To get started with the Configuration wizard, navigate back to the home page and click on the Configuration Wizard link.

ix7805On The first page of the Configuration Wizard tells us we need to log in. The user name and password you need is provided by Intertex and is a way of controlling the licenses that you need to be able to use the different functions that the IX78 includes. If you don’t have a username and password please contact Intertex and they will get you settled.

To continue, click on Log In  next to The PBX Wizard.

ix7806

Enter the username and password you provided to you by Intertex and click on Log In to continue.

ix7807

In this step you need to choose the PBX you are using, in our case it is Lync 2010. Choose Microsoft OCS 2007/Lync 2010 and click Next to continue.

ix7808

Under Select your Internet access, select the following settings to configure the Cellip trunk. Change these settings to match the information needed for your provider.

Trunk Service: Service 1 – No accounts need to be registered
SIP Server: 62.80.200.53

Under Select your firewall configuration, select Use the E-SBC as WAN SIParator® 1, connecting the existing firewall to the ET4 port of the E-SBC and sharing a single WAN IP-address and click Next to continue.

ix7809

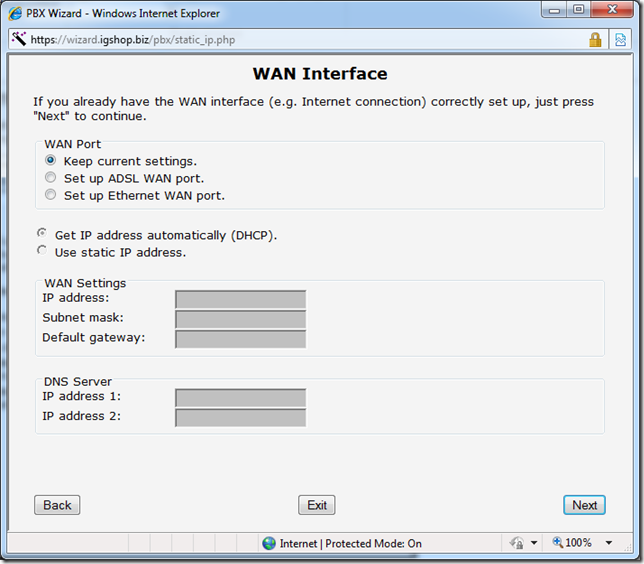
Now you have the option to configure your network settings, if you did not do it before starting the guide change the settings to match you environment. If you already have configured networking for your device like me, check Keep current settings. and then click next to continue.

ix7810

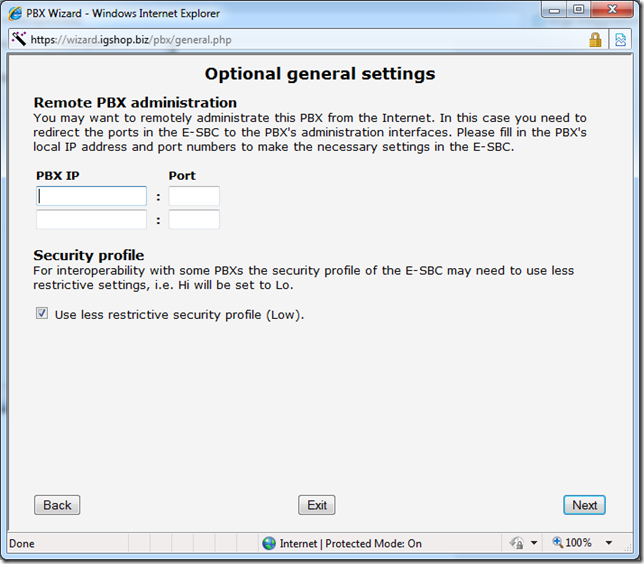
More network settings, change the IP-address if you need to, click next to continue when ready.ix7811

In the next step it is time to enter the IP-address for your PBX, in other words, your Microsoft Lync 2010 Server. In my case it is 192.168.10.35, enter the IP-address for your server and then click next  to continue.

ix7812

In my case I only have one number from Cellip so I do not have to worry about Called-ID. Check the option matching your requirements and then click next to continue.

ix7813

Since we use internal extensions in Lync we will configure the IX78 to forward calls using internal extensions, choose The PBX uses internal extension numbers on its SIP trunk. then enter your external number assigned to you by your trunk provider and the internal extension matching that number.When finished, click next to continue.

ix7814

We will not configure any optional phones, click next to continue.

ix7815

You can skip the next page to, click next to continue.

ix7816

the last page before completing this wizard is a summary showing you the settings you have made. Take a moment to go through the settings and click Download when finished. This configures the device, if you press Exit you will quit the Wizard discarding all changes.

ix7817

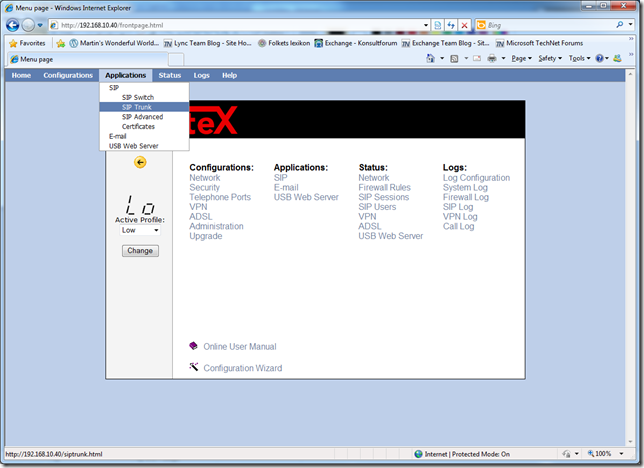
When the Wizard closes, navigate to the start page of your IX78 and open the SIP Trunk page.

ix7818

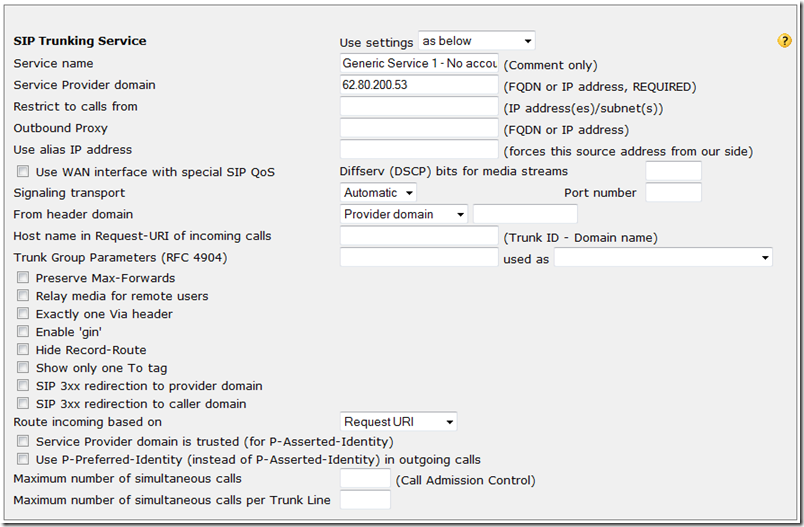
Now we need to go through the SIP Trunk settings. Go through all of these blocks and make sure that your settings matches the ones I have in this example except for phone numbers and IP-addresses.

ix7819

ix7820

ix7821

Now your IX78 should be all set and this concludes part one in this series. In post two we look at the Lync configuration.

Part 1 in this series can be found here!

Part 2 in this series can be found here!

Installing Lync Server 2010 consolidated standard edition server, step-by-step – Part 3


Add User account to CSAdministrator group

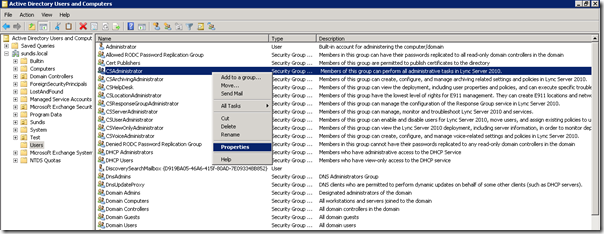
Now we need to configure administrative access for a user so we can access the Lync Server 2010 Control Panel. Head over to a suitable domain controller and open Active Directory Users and Computers. Navigate to the Users OU and find the group CSAdministrator. Right click the group and choose Properties.

lync82

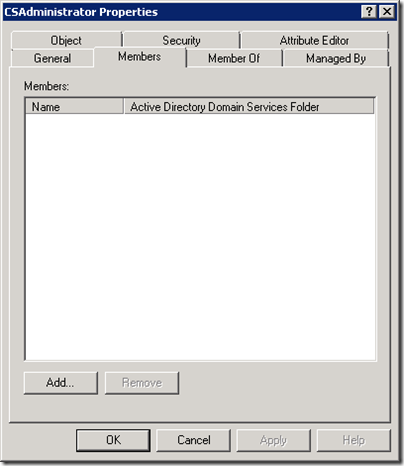
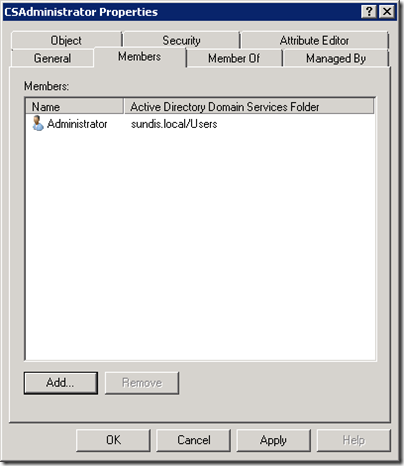
This opens the property page for the group CSAdministrator. Click on the Members tab and then click Add.

lync83

Enter the name of the account you want to add and then click Check Account. When the account is verified click Ok to add the account as a member of the group.

lync84

Click Ok to close the property page and the process is finished.

lync85


The Lync Server 2010 Control Panel

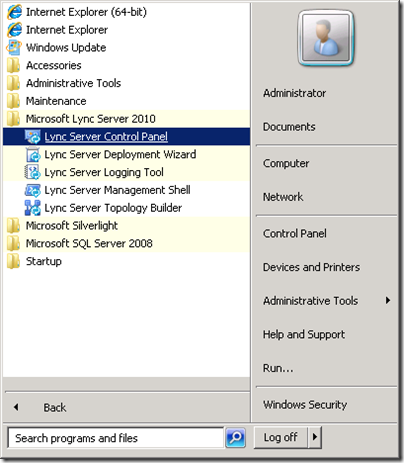
Now we can have our first look at the Lync Server 2010 Control Panel, locate the shortcut on the Start Menu and launch the utility.

lync86

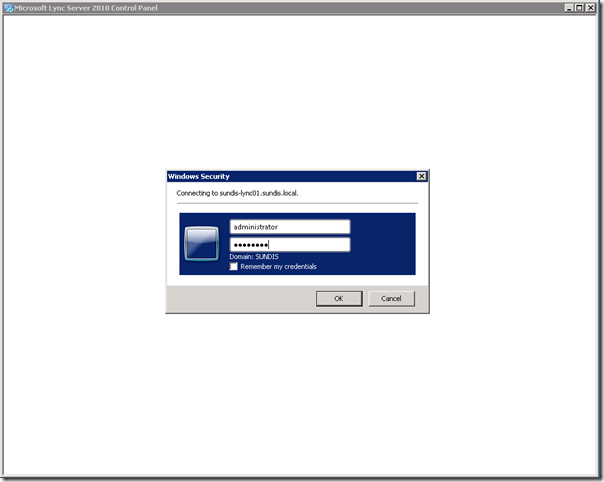
We have to authenticate using the account we added to the CSAdministrator group earlier.

lync87

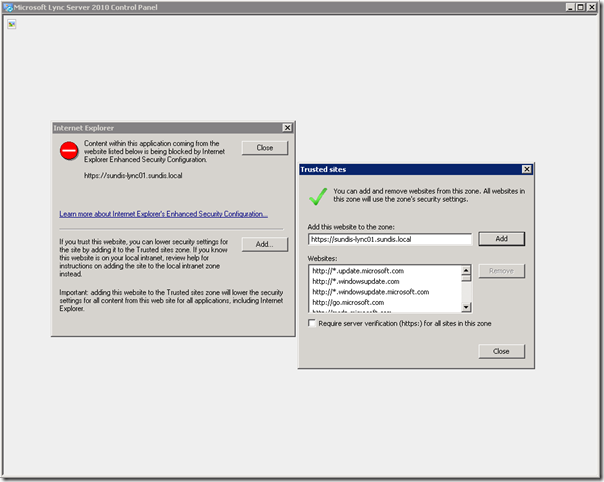
Add the site to trusted sites when you receive the security warning.

lync88

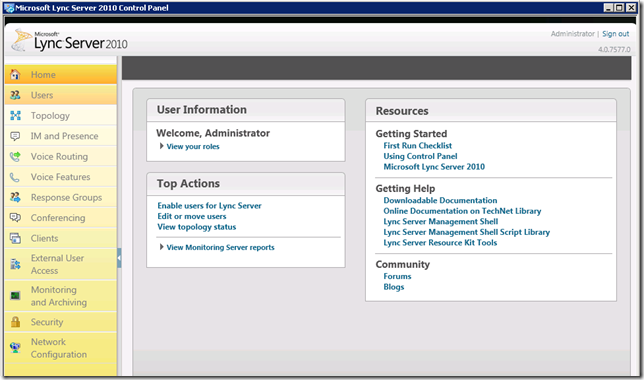
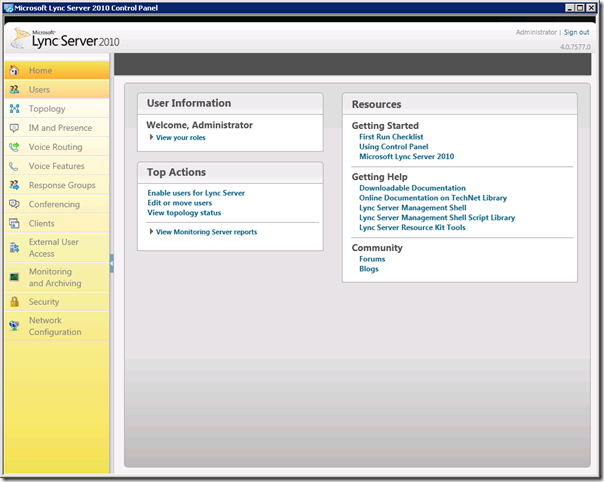
You will now be taken to the welcome page on the Lync Server 2010 Control Panel. This page contains links to common tasks and different help topics. We will take a moment to go through some of the tabs available and then you can look through all the tabs on your own to get a more deeper idea on how this tool is partitioned. Click on Users to open the users page.

lync89

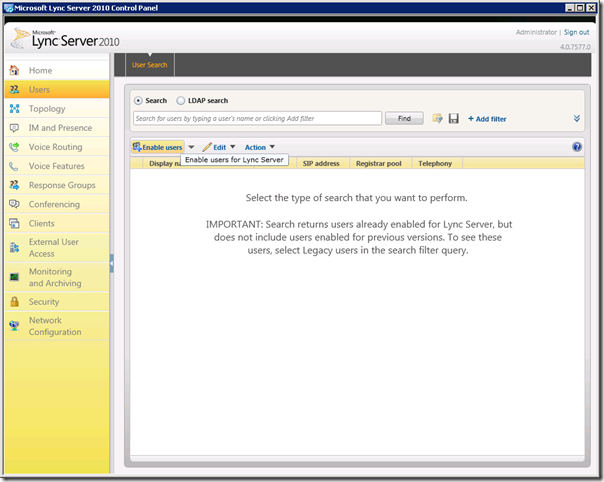
Let us start with enabling the users for Lync Server 2010, click on Enable Users.

lync90

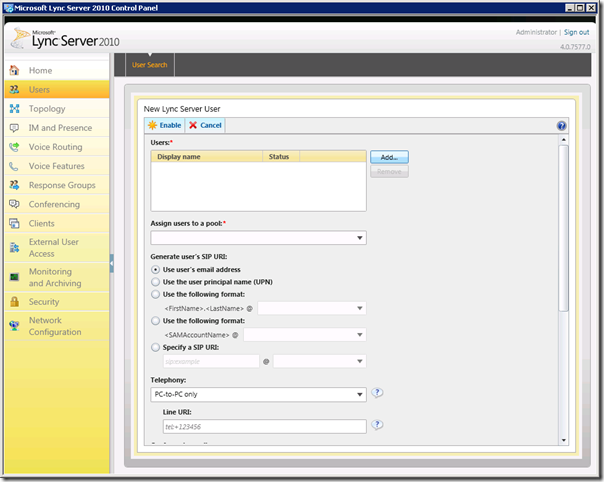
Click on Add to add a user.

lync91

Enter a username and click Find,  select the user you want to enable and then click Ok.

lync92

Assign the user to a pool by choosing the correct one in the Assign users to a pool drop down list. Then click Enable to finish the configuration.

lync93

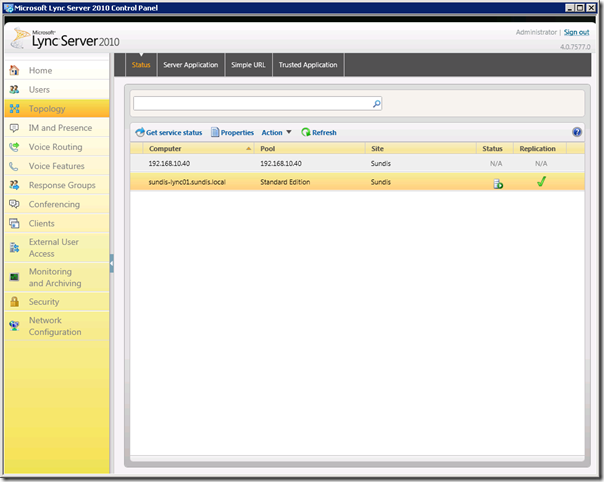
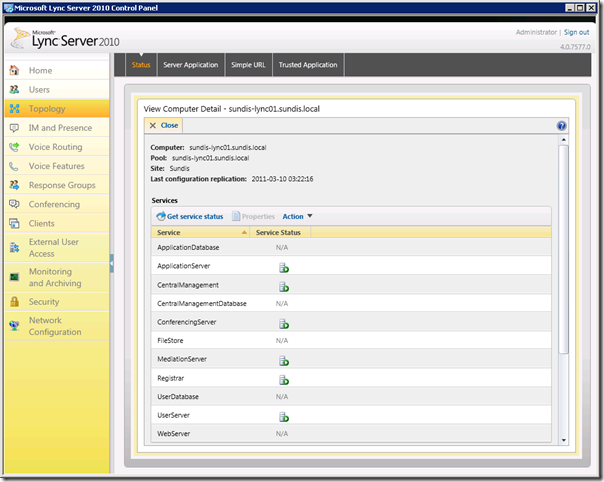
You have now successfully enabled a user for Lync Server 2010. To continue, click on Topology in the left pane and you will see a list of server included in this topology. For example, this tab is useful in order to get a quick look on how your servers are doing and if there are any events that you need to address. Double click on your server, in my case sundis-lync01.sundis.local  to see a detailed list of the services running on this server.

lyn95

This brings up Computer Details for the specific server. In my case all the services on my server is running fine. For example, you can choose to stat and stop services using the Actions menu, close this window by clicking Close.

lync96

I will not include any more tabs in this guide, I will save this for upcoming posts. I am working on a post on how to integrate Lync 2010 with Exchange 2010 UM and another one on how to use Lync 2010 and Asterisk to handle a consumer grade SIP trunk. I those post we will dive a bit deeper in the phone part of Lync 2010.

The Lync 2010 Client

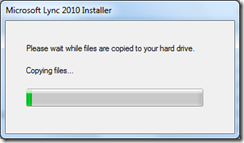
We have one last thing to do in this post and that is to test client connectivity and make sure that IM/Presence is working. let’s move on to installing the Lync 2010 client on a PC. The first window you will se flashing by after you execute the client installation file is a loading status.

lync97

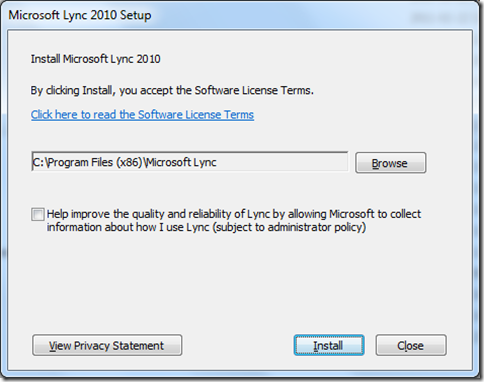
You will then be able to choose location for the installation, click on Install to continue.

lync98

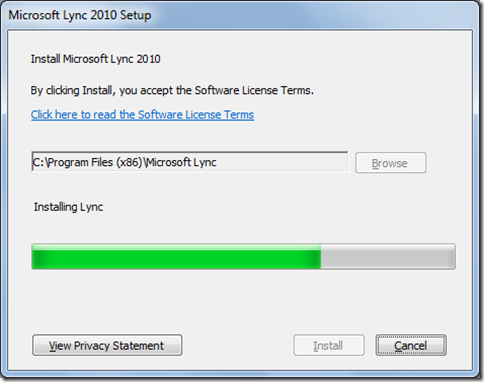
A progress bar will show the process.

lync99

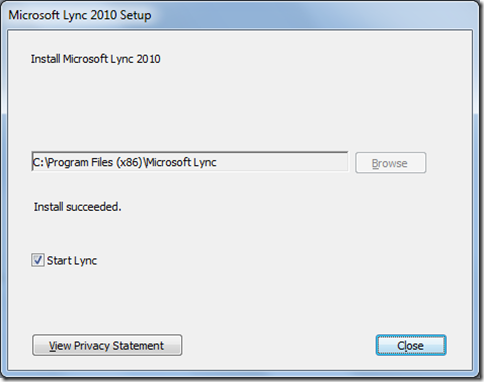
When the installation is finished, click on Close to complete the installation.

lync100

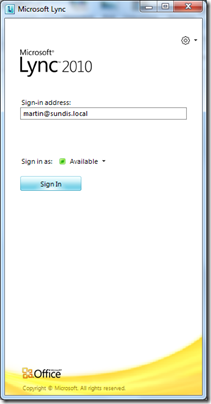
The Lync client will now launch automatically unless you unclicked Start Lync, and if all is well you should be able to log in.

lync101 

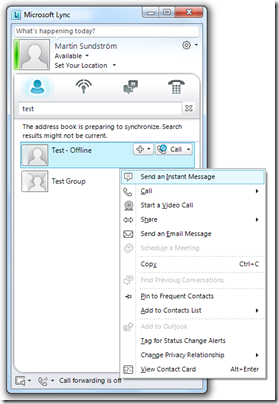
You will see the default tab in Lync, search for a another user, right click the user and select Send an Instant Message.

lync102

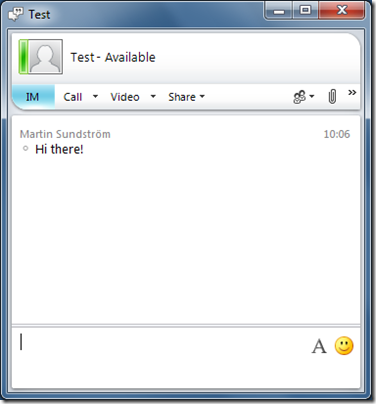
Enter the text you want to send an hit Enter. And we now have a working IM solution based on Lync 2010!

lync103

This ends part 3 in this series. There is a couple of more posts coming that I will finish in the near future, I am working on a couple of technical issues that I need to address before publishing the posts. Thanks for reading and please let me know if you find any errors or have any further questions.

Part 1 in this series!

Part 2 in this series!

Part 3 in this series!

Installing Lync Server 2010 consolidated standard edition server, step-by-step – Part 2

It is time to continue with our Lync Server 2010 installation. We will jump in and start where we left it in the first post.


Installing Lync Server 2010 – continued

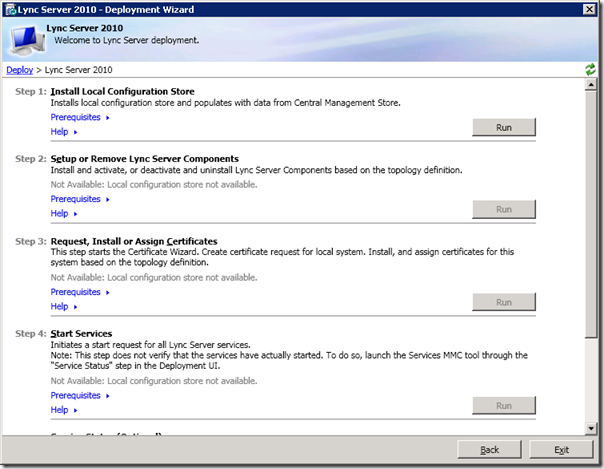
Click on Install or Update Lync Server System.

lync50 

To continue with our deployment click on Install Local Configuration Store.

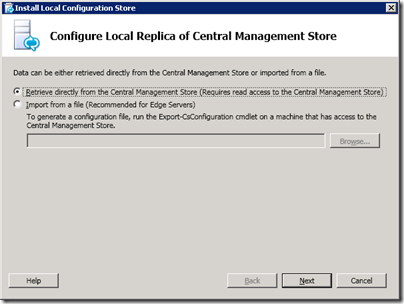
lync51

Since we published our topology in the last post we can keep the setting Retrieve directly from the Central Management Store, click on Next to continue.

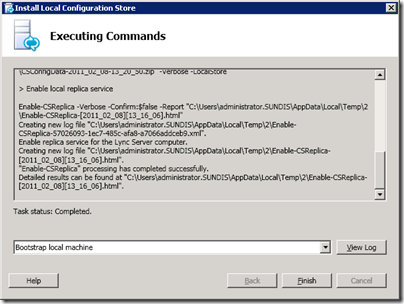
lync52

The installation will run automatically, click Finish when the Task Status says Completed.

lync53

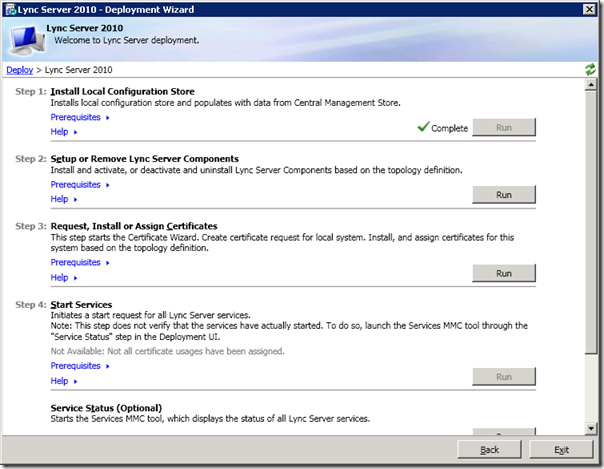
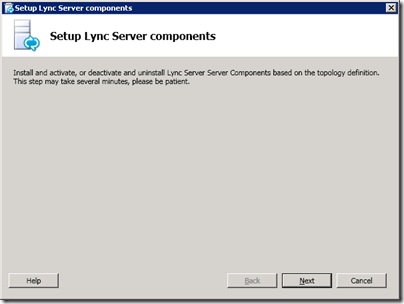
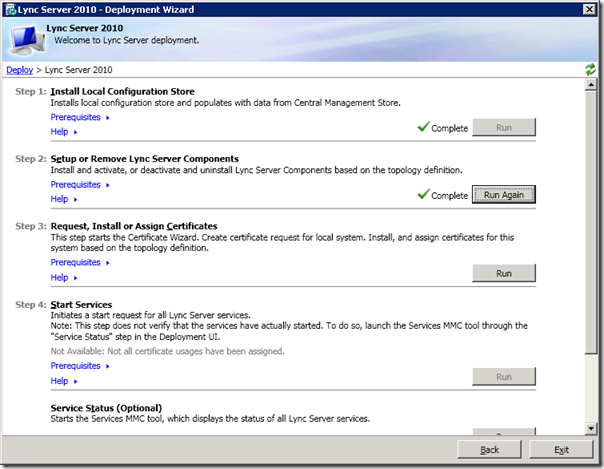
Moving on to Step 2: Setup or Remove Lync Server Components.

lync54

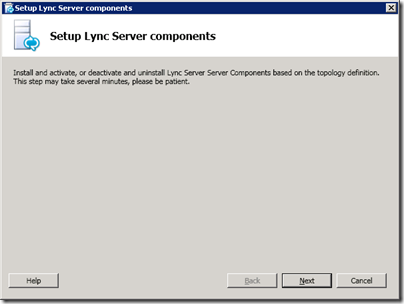
When the wizard starts click Next to continue.

lync55

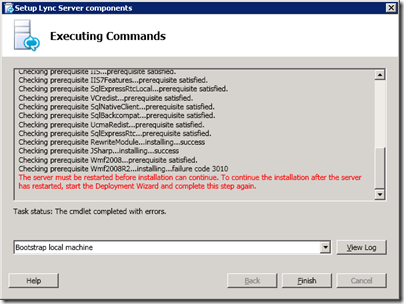
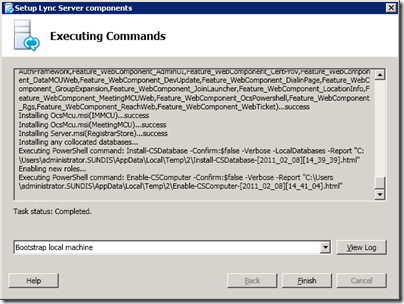
Another automatic installation, click Finish when the Task Status says Completed. Note you might be prompted to restart the server as in my example.

lync56

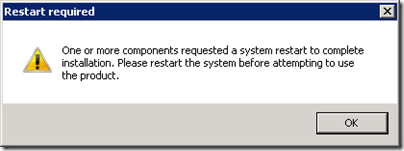
If the restart prompt appear, click Ok and then restart the server.

lync57

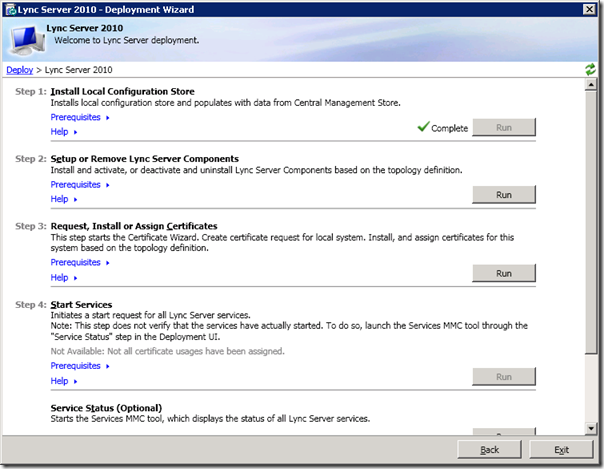
After the restart open the deployment wizard, run Step 2: Setup or Remove Lync Server Components again.

lync54

When the wizard starts click Next to continue.

lync55

Another automatic installation, click Finish when the Task Status says Completed.

lync58

Back in the deployment wizard we choose to continue with Step 3: Request, Install or Assign Certificates,

lync59

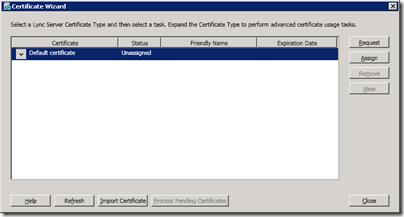
When the Certificate Wizard opens, select Default Certificate and then click Request.

lync60

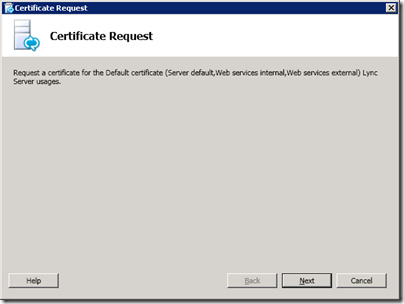
When the wizard starts, click Next to continue.

lync61

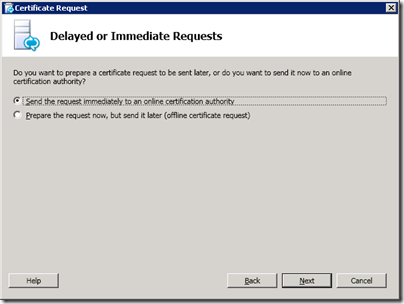
We will choose to send the request immediately, click Next to continue.

lync62

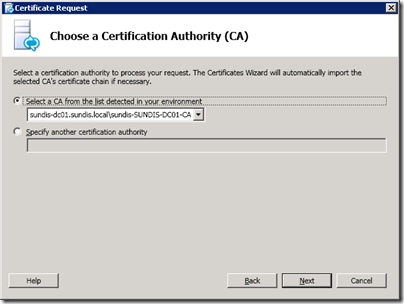
For this simple deployment a certificate issued by a local CA will do just fine, choose your local CA in the drop down list and click Next.

lync63

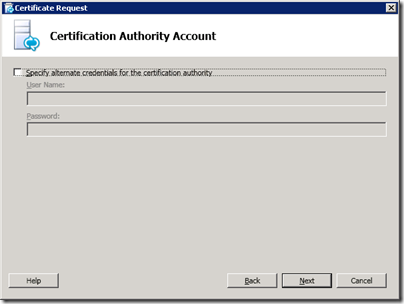
If needed, enter the credentials needed to contact the local CA and click Next to continue.

lync64

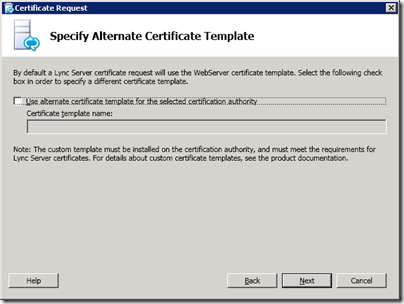
We will not specify any alternate templates, click Next to continue.

lync65

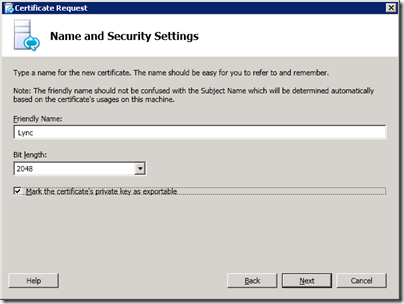
Provide a friendly name and check Mark the certificate´s private key as exportable, then click Next to continue.

lync66

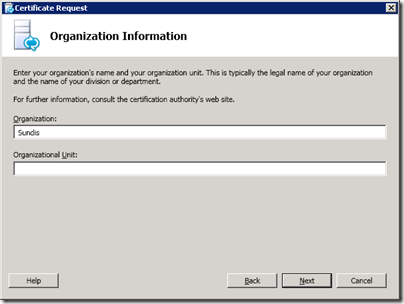
Fill in the required fields on the Organization Information page and click Next.

lync67

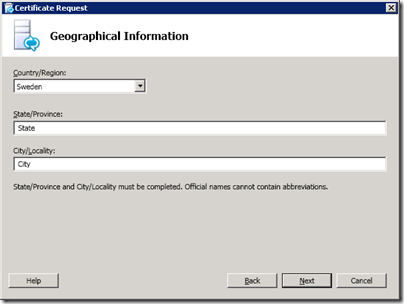
Fill in the required fields on the Geographical Information page and click Next.

lync68

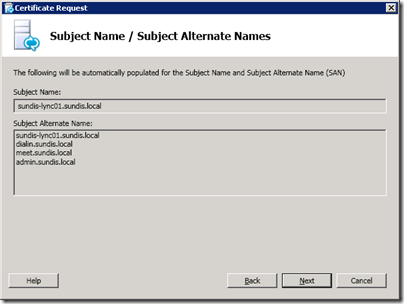
The wizard will populate the certificate automatically, click Next.

lync69

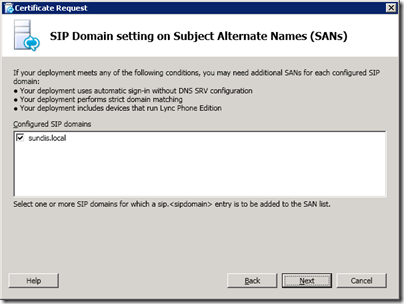
On the SIP Domain setting page, select your local domain as the SIP Domain and then click Next  to continue.

lync70

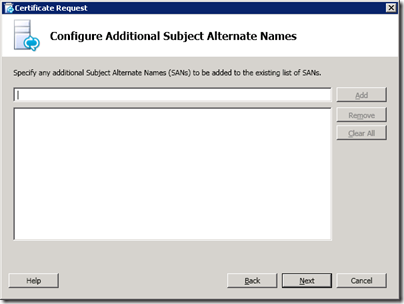
We do not need any additional SANs for now, click Next.

lync71

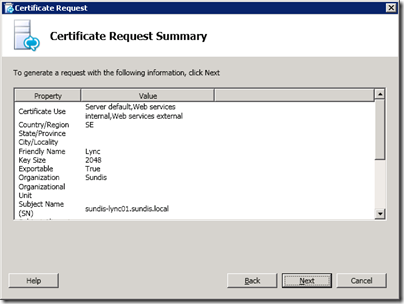
Review the summary and click Next.

lync72

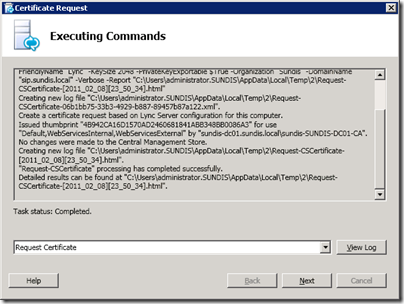
After the installation, click Next when the Task Status says Completed.

lync73

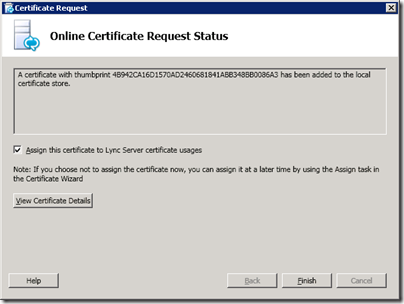
When you click Finish the Certificate Assignment wizard will start.

lync74

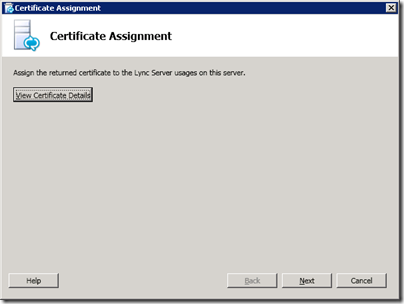
Click on Next to continue with the wizard.

lync75

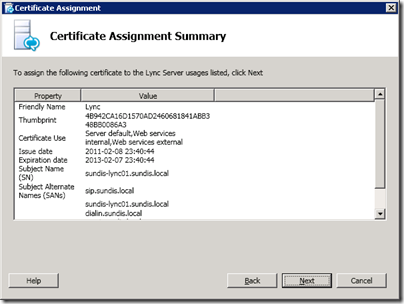
Review the Certificate Assignment Summary page, click Next.

lync76

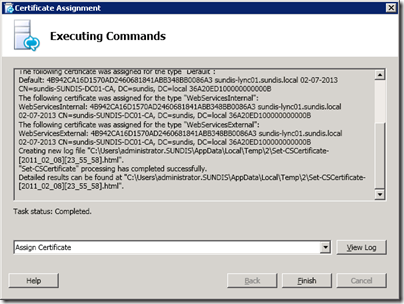
Wait for the configuration to complete and then click Finish.

lync77

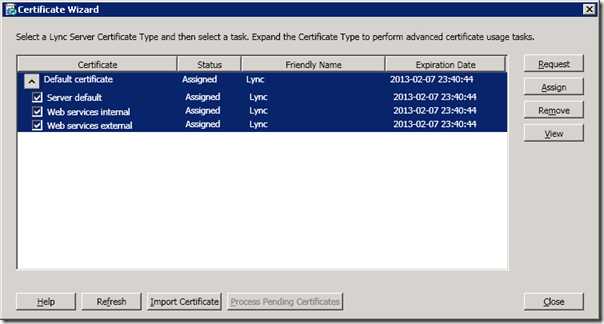
This takes you back to the Certificates Wizard, click on Close.

lync78

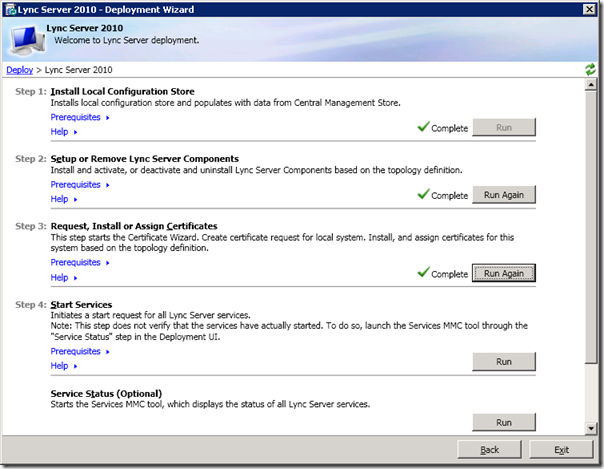
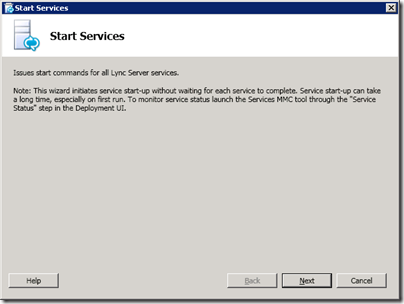
The final step, Step 4: Start Services, starts the Lync Server 2010 services, click on Run.

lync79

Click Next to continue.

lync80

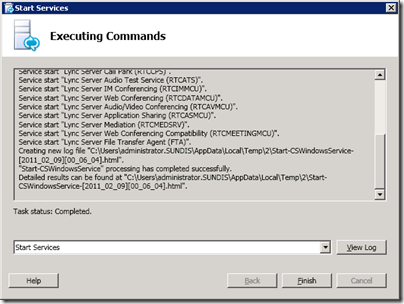
Wait for the configuration to complete and then click Finish.

lync81

Click on Exit to close the deployment wizard.

This ends part 2 in this series, thanks for reading and let me know if you have any questions!

Part 1 in this series!

Part 2 in this series!

Part 3 in this series!

Installing Lync Server 2010 consolidated standard edition server, step-by-step – Part 1

This is my first technical post about Lync Server 2010 and I will kick off my series of Lync Server 2010 posts with a basic installation and configuration post. I will guide you through the installation process and show you how to make a basic IM/presence and video conferencing configuration. I am also working on a post on how to integrate Lync Server 2010 with Asterisk to be able to use a consumer grade SIP trunk for phone support.

Pre-requirements

I will base this server one Windows 2008 R2 Standard and it is placed on a Hyper-V 2008 R2 host. First we need to start with installing the pre-requirements. Please make sure that you have installed all available updates from Microsoft Update before you continue. To start the requirements installation we can use PowerShell.

To import the Server manager module run the following command:

Import-Module ServerManager

lync1

Now we can start the actual installation of all required components with the following command:

Add-WindowsFeature NET-Framework,RSAT-ADDS,Web-Server,Web-Static-Content,Web-Default-Doc,Web-Http-Errors,Web-Http-Redirect,Web-Asp-Net,Web-Net-Ext,Web-ISAPI-Ext,Web-ISAPI-Filter,Web-Http-Logging,Web-Log-Libraries,Web-Http-Tracing,Web-Windows-Auth,Web-Client-Auth,Web-Filtering,Web-Stat-Compression,Web-Mgmt-Console,Web-Scripting-Tools -Restart

After the installation the server will restart automatically since we added the –Restart parameter.

lync2

Also, install Microsoft Silverlight, this is needed to run the Lync Server 2010 installation GUI. Silverlight can be found here: http://www.microsoft.com/getsilverlight/Get-Started/Install/Default.aspx

The installation of Silverlight is very straight forward, after the download run Silverlight.exe and click on Install now. The installation process will start and when finished click Next and then Close.

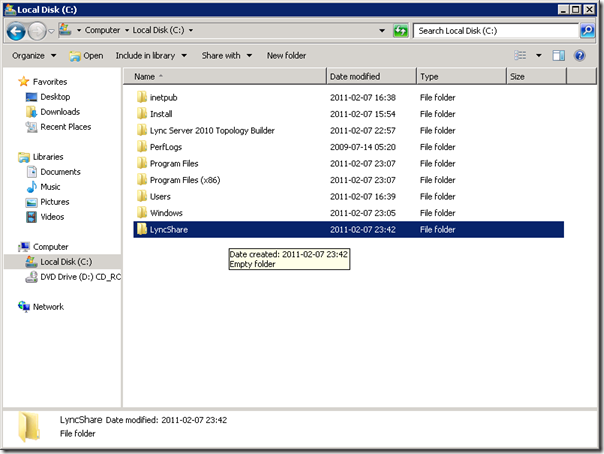
We also need to create a file share on the Lync server 2010 server. I will place my directly under C: and name it LyncShare.

lync27

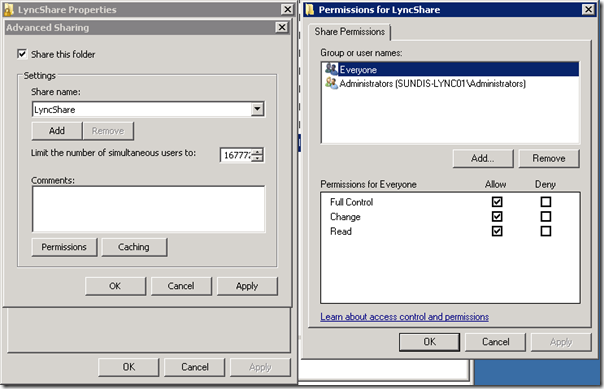
Share the folder and make sure that everyone has full control.

lync28

We will also be needing a number of DNS entries. Add the following records to your domain controllers DNS servers.

Name Target
meet.sundis.local <Lync 2010 Server IP>
admin.sundis.local <Lync 2010 Server IP>
dialin.sundis.local <Lync 2010 Server IP>

Now we are ready for the fun stuff!


Installing Lync Server 2010

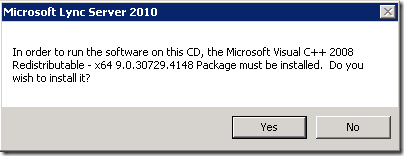
Insert your Lync Server 2010, if AutoPlay does not start, navigate to your drive \Setup\amd64 and execute setup.exe. The first thing you will need to do is to install Microsoft Visual C++ 2008 Redistributable Package, click Yes to proceed.

lync6

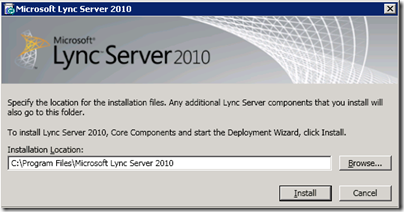
When Microsoft Visual C++ 2008 Redistributable Package is installed you will need to choose the installation directory. The default location will be just fine for me, change the location to match your preferences and then click Install.

lync7

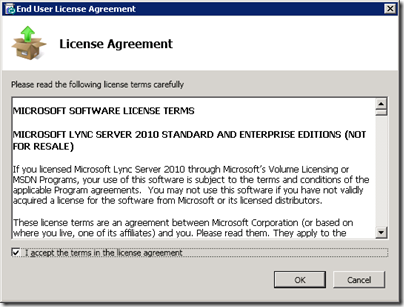
Next you need to accept the license agreement, check I accept the terms in the license agreement and then click Ok.

lync8

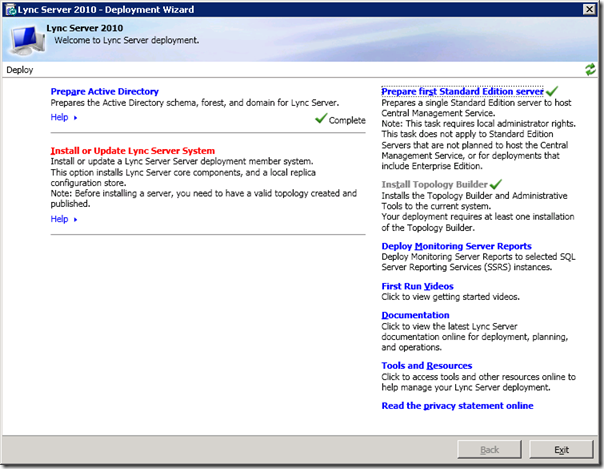
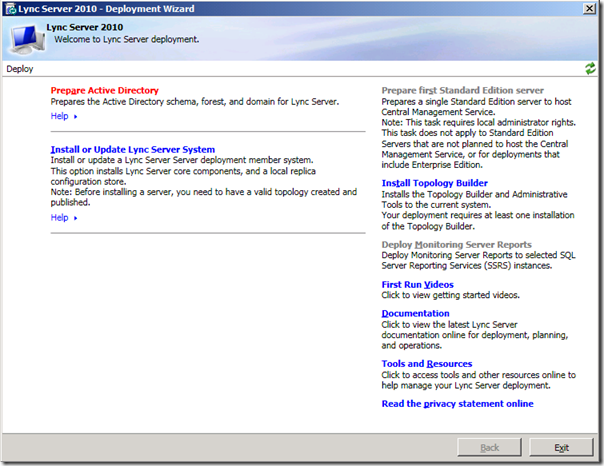
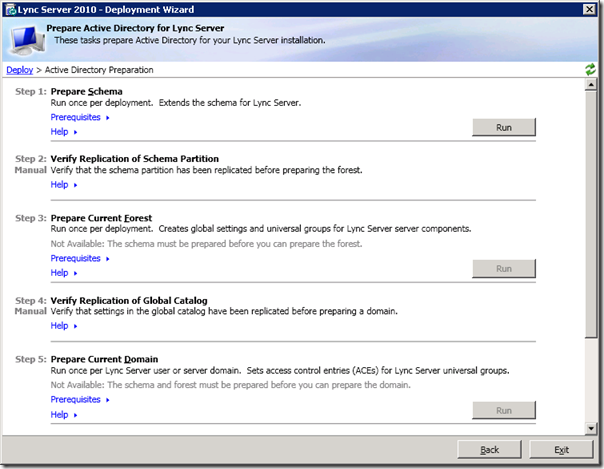
Now the Deployment Wizard launches and you will have a number of choices. We will start with Prepare Active Directory.

lync38

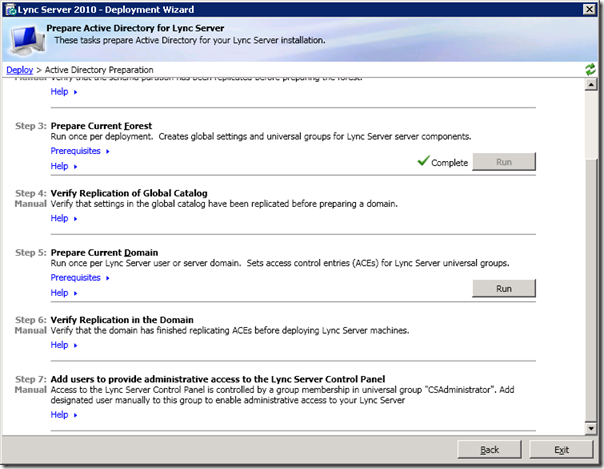
We will now have number of steps to complete, go through each of them starting from the top with Prepare Schema, click Run to start the wizard.

lync39

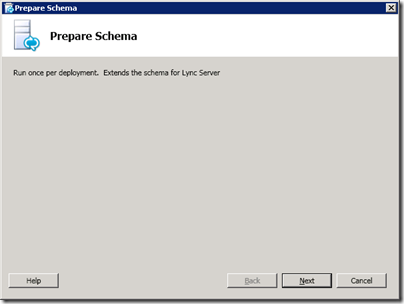
When the wizard starts click Next to continue.

lync40

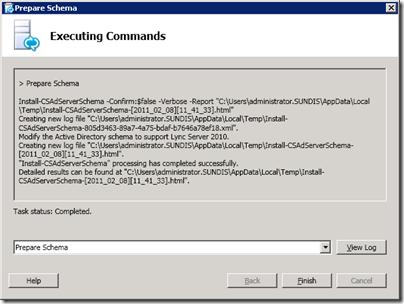
The schema preparation is automatic, click Finish when the Task Status says Completed.

lync41

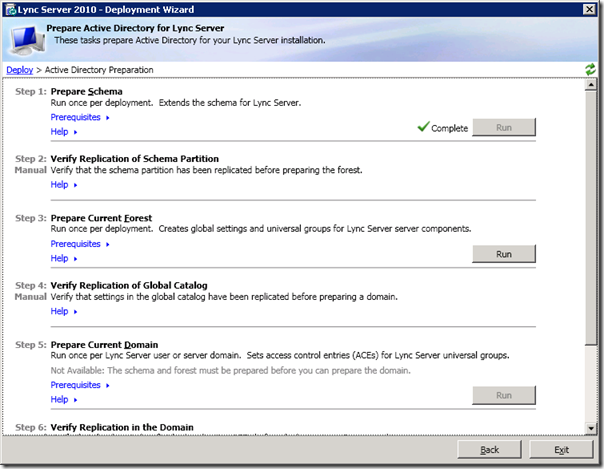
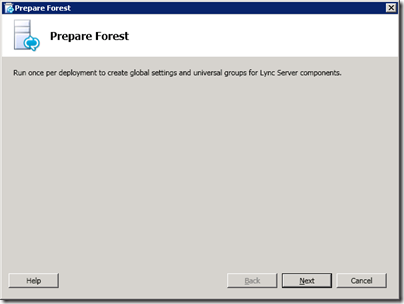
The next step is to Prepare Current Forest, click Run to start the wizard.

lync42

When the wizard starts click Next to continue.

lync43

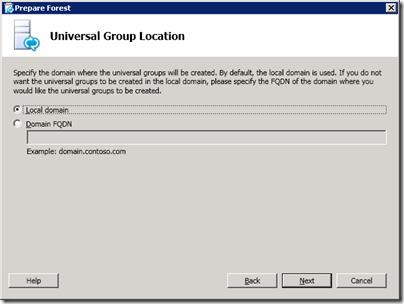
We will configure the local domain, click Next to continue with defaults.

lync44

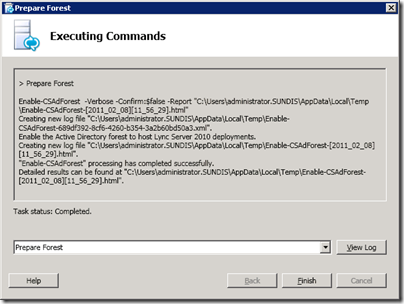
The forest preparation is also automatic, click Finish when the Task Status says Completed.

lync45

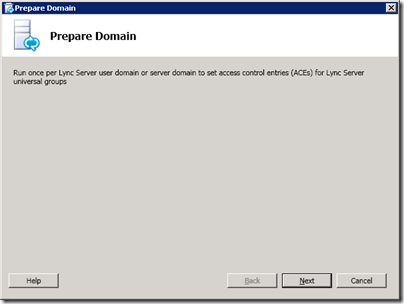
The last preparation wizard we need to run is Prepare Current Domain, click on Run to start the wizard.

lync46

When the wizard starts click Next to continue.

lync47

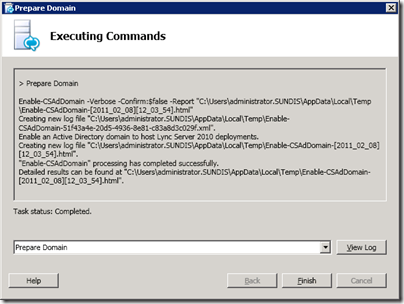
Again, the preparation is automatic, click Finish when the Task Status says Completed.

lync48

The last step is to grant access to the Microsoft Lync Server 2010 Control Panel, do the following:

  1. Log on as a member of the Domain Admins group or the RTCUniversalServerAdmins group.
  2. Open Active Directory Users and Computers, expand your domain, right-click the Users container, and then click Properties.
  3. In CSAdministrator Properties, click the Members tab.
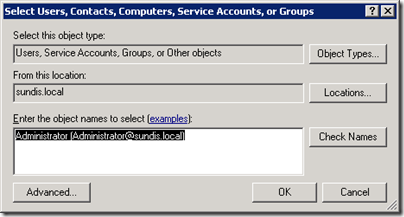
  4. On the Members tab, click Add. In Select Users, Contacts, Computers, Service Accounts, or Groups dialog, locate the Enter the object names to select. Type the user name(s) or group name(s) to add to the group CSAdministrators. Click OK.
  5. On the Members tab, confirm that the users or groups that you selected are present. Click OK.
    After completing all the steps, click on Back to return to the Deployment Wizard.

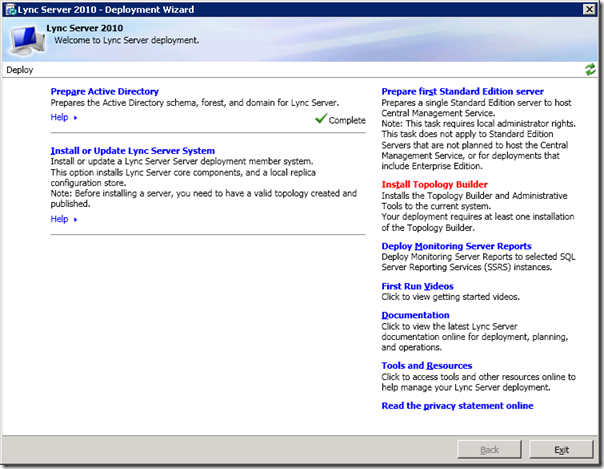
Moving on, The Topology Builder is next and with this tool we create a topology that we use to deploy the actual Lync Server 2010 system. To start the installation click on Install Topology Builder.

lync9

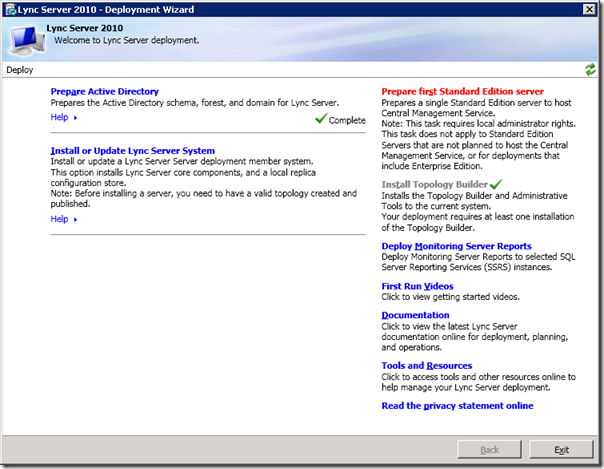
The installation will now run and it is automatic, when it is finished we will move on to Preparing the first Standard Edition server.

lync49

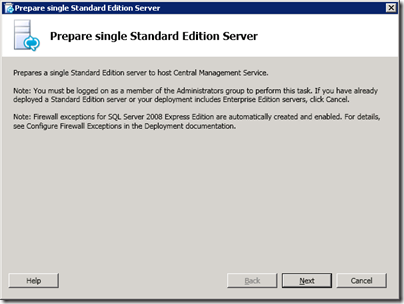
On the introduction screen click Next to continue.

lync19

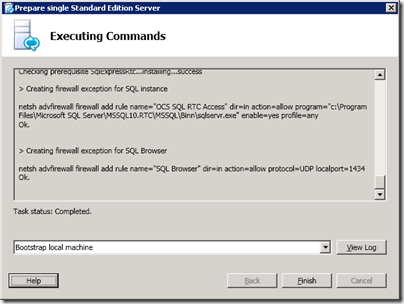
The installation will begin and when completed click Finished to close the wizard.

lync20

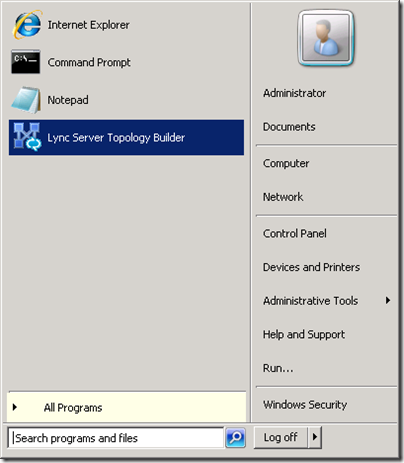
Now it is time to start with some configuration, locate the Lync Server Topology Builder on the Start Menu.

lync11

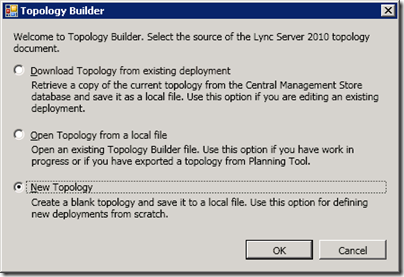
The first thing we need to do is to select if we have a topology we want to open or if we want to create a new one. Choose New Topology and click Ok.

lync12

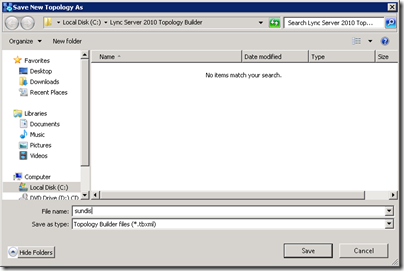
Choose where to save your topology files, I will save my files in C:\Lync Server 2010 Topology Builder and call it sundis.tbxml. When you are finished choosing name ad location click Save.

lync13

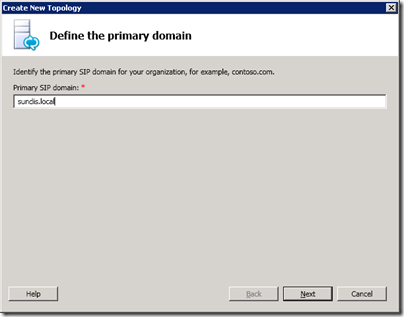
Then enter a SIP domain that matches your preferences, I will enter sundis.local. This is the internal domain name in my family domain and will work well for the purpose of this installation, click Next to continue.

lync14

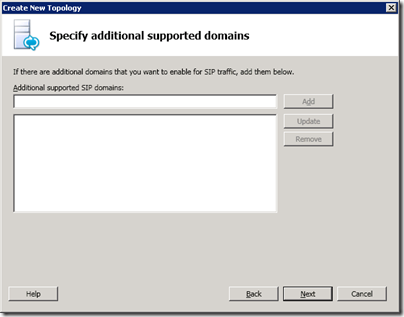
We will not add any additional SIP domains at this point, click Next to continue.

lync15

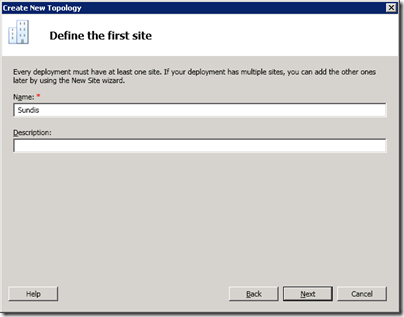
Enter a name for you default site, I will enter Sundis, then click Next to continue.

lync16

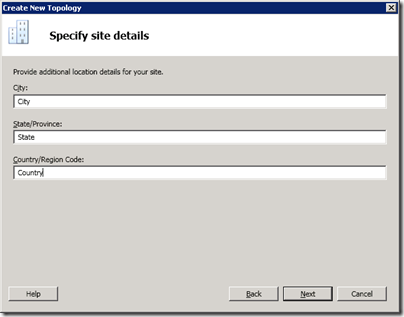
Enter your City, State and country and click Next to continue.

lync17

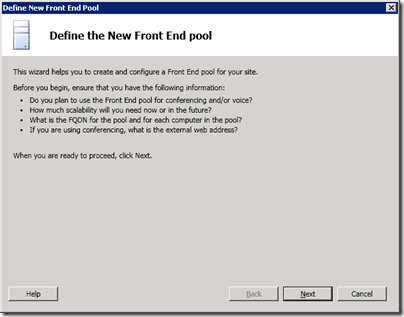
We want to continue to configure a front end pool so click Finish. When the New Front End Pool wizard starts click Next to continue.

lync21

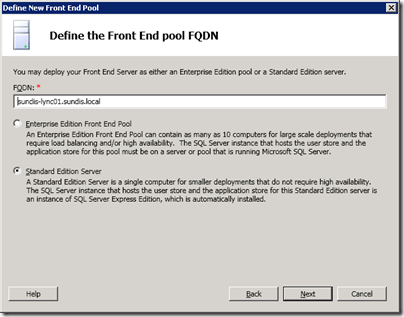
Now we must define a FQDN for our Front End Pool. Wine this is a simple single server installation I will use the servers FQDN sundis-lync01.sundis.local. Chose Standard Edition Server and click Next to continue.

lync22

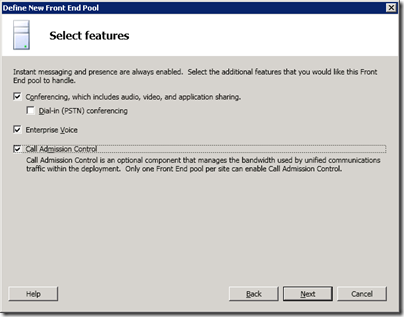
We will chose the following components for this installation:

  • Conferencing (without Dial-in for now)
  • Enterprise Voice
  • Call Admission Control

    Check those options and then click Next to continue.

    lync23
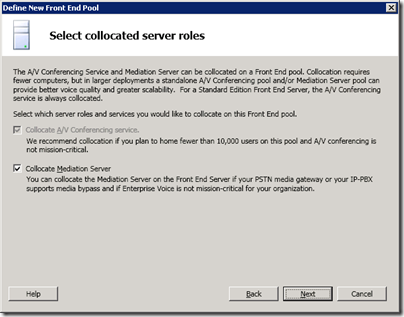
    We will collocate the mediation server, check Collocate Mediation Server and then click Next.
    lync24
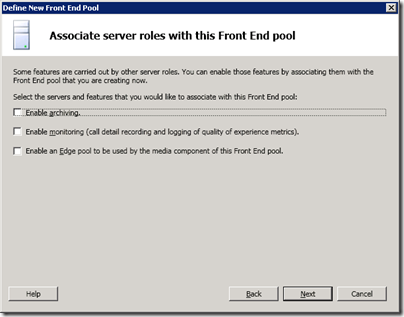
    We will not enable any more components, click Next to continue.
    lync25
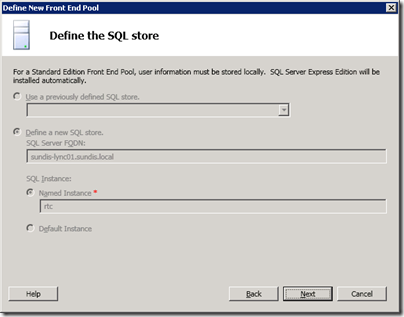
    We have already installed SQL server on the Lync Server 2010 server and the wizard finds it automatically. Click on Next to continue.
    lync26
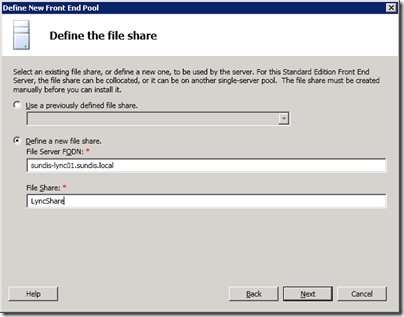
    Now we will enter the share name we used when creating the file share earlier. I named the share LyncShare, enter your share name and click Next to continue.
    lync29
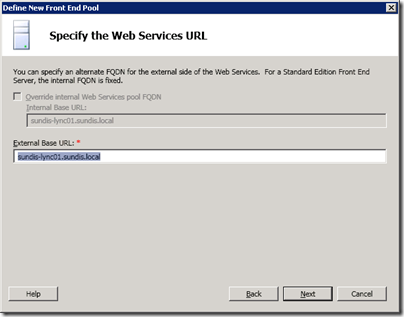
    We will not enter a public FQDN at the moment and will leave it as default, click Next  when finished.
    lync30
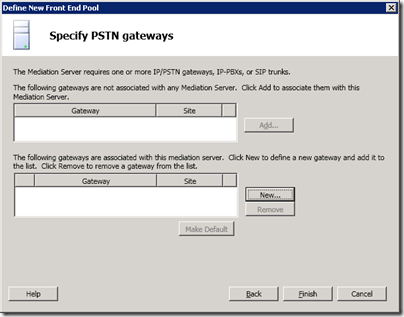
    We will not add a gateway at this moment, click on Finish to end the wizard.
    lync31
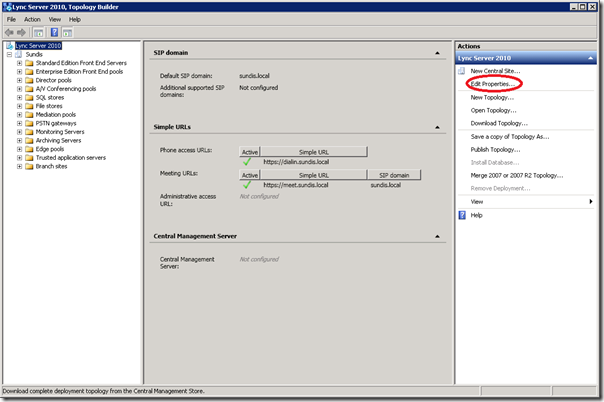
    When the wizard closes you will be presented with the Topology builder, Take a moment to go through the configuration, then go back to the original screen an click on Edit Topology.
    lync32
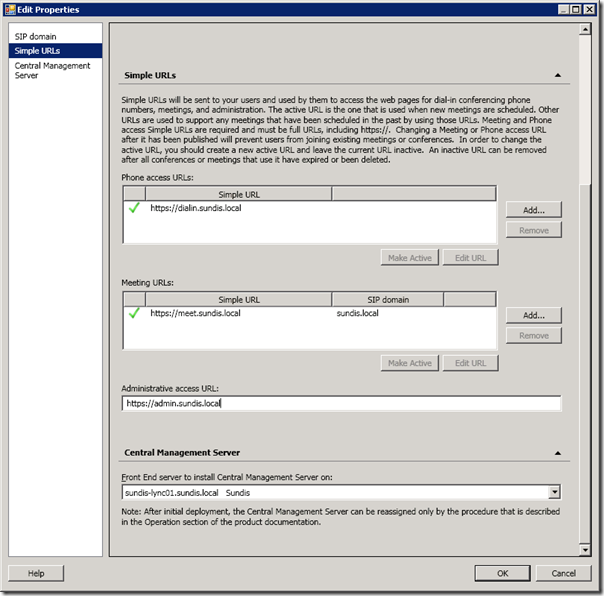
    In the left pane, select Simple URLs, in the main pane, enter a URL in the field Administrative access URL. In my case this is https://admin.sundis.local, then choose the Front end server to install Central Management Server on. If all is well you should only have one choice here, click Ok when done.
    lync33
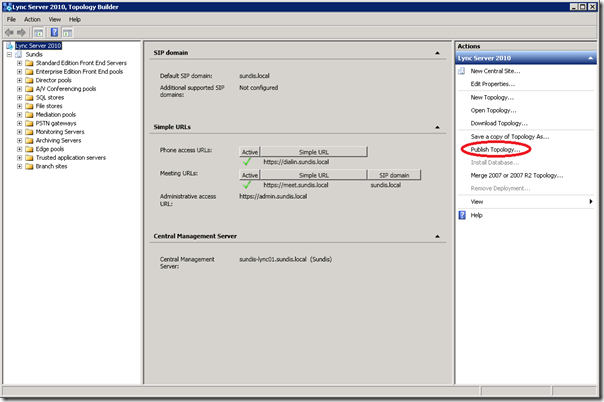
    Now it is time to publish our topology to the management server. Back in the topology builder, click on Publish Topology in the Actions Pane.
    lync34
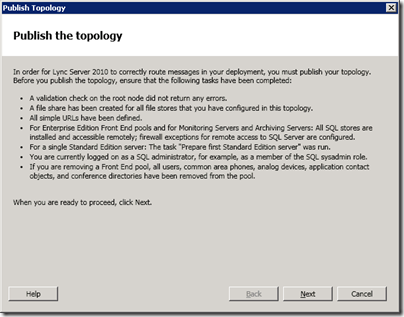
    When  the wizard has loaded, click on Next to start the publishing.
    lync35
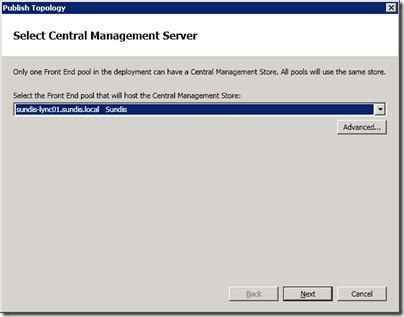
    You should only have one Central Management Server, make sure it is selected in the drop-down list and then click Next.
    lync36
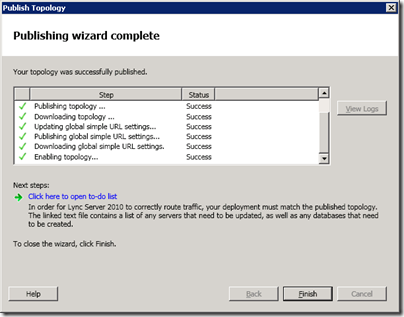
    When the wizard completes, make sure that all steps are successful an then click Finish.
    lync37 
    This concludes part 1 in this series on Lync Server 2010. Thanks for reading, I hope that you find it helpful!

Part 1 in this series!

Part 2 in this series!

Part 3 in this series!